Allsorts challenge 06-01-18 week 449

Todays card is for the challenge set over on Allsorts Challenge Blog,

I used half of a A4 piece of white card cut at 5 7/8 and folded in half, for the base,  the layering mat is a soft pink measuring 5 3/4  by 4 inches and the designer paper is from Bella and Boo collection cut at 1/8 inch smaller than the mat.

I then cut 2 sets of ovals from my stitched framelits and stamped the sentiment and the animals in a darker pink ink.

allsorts challenge 06-01-18

The theme is New stash / baby / home, I hope you like it………..thanks for stopping by D x


Design Team colour challenge 3-01-18

As part of the Design team for Stampinforall community over on facebook, we have been set a colour challenge using the colours Lemon Lime Twist, Berry Burst and Bermuda Bay. Below is my take on the colour challenge. Hope you like it and can get inspiration from it…. enjoy creating.. ..Thanks for stopping by x D

All products used can be purchased through my online shop. If you would like a catalogue please do not hesitate to contact me and I will happily put one in the post for you.   Don’t forget with every £45 purchase you can choose a free item from our Sale-a-bration catalogue from 3rd Jan to 31st march.

Whisper white cardstock  106549

Lemon Lime Twist cardstock  144250

Tutti Frutti Designer paper   145606

Stitched edged Framelits   145372

Bermuda Bay ink    131171

Burlap Ribbon   141487

Southern Serenade Stampset   145921

Birthday cards

Hello all I hope you have had a wonderful Christmas and I wish you all the best for the new year. I have been having a play with some of my new stamp sets from Stampin ups new 2018 catalogue available in January. To show the versatility of the stamps and inks and the way everything co-ordinates I have produced a feminine card and a more masculine card using one of my favourite colours, Night of Navy, and teamed it with Whisper white cardstock.

The original idea came from the talented Gaynor Boyce better known as (Missgcrafts) on youtube so please go on over and show this lovely lady some love.

I hope you like them both and can use the inspiration yourselves, all products used with exception of the edge die are available from my Stampin up online store.

birthday cards for blog

The cardbases are Night of Navy with Whisper White stamping layers for the front and the inside of the card,  I used the edge die (from my own stash) to cut the front of the cards at an angle but if you don’t have an edge die you could tear the cardstock as Gaynor did I then adhered the whisper white cardstock to the fronts.

I then stamped the Hat, cupcake, and the present  from the Party hat birthday stamp set for the masculine card in Night of Navy ink, the sentiment is from the Birthday Wit stampset. The flowers from the Touches of Texture were stamped in Berry burst, Night of Navy, Bermuda bay and Pool party inks and then fussy cut and adhered to the card with Mini dimensionals.

Please feel free to browse my online store and contact me if you would like a catalogue…thank you for stopping by….x D


Teacher gifts using stampin’up

Well Christmas is nearly upon us whether we are ready or not and the children/grandchildren will be breaking up from school I have made the following projects to be given as teacher thankyou gifts.

teacher giftsI made these for my grandchildren to give out there is a covered notebook, Christmas card and a decorated small pizza box available from stampin up. All  the products I used to decorate these are listed below and are available from my Stampin up online store.

Crumbcake cardstock

Garden green cardstock

Merry Music Speciality designer series paper

Gold snowflakes

Stitched framelits circles

Gold embossing powder

Holly jolly layers stamp set ( I’m not sure if this is still current but I will check)

Merry little labels stamp set

Mini pizza boxes

Big shot

Tombow multi glue

The Christmas card is 10″ x 5″ scored and folded at 5″ the garden green layer is 1/8″ smaller and the designer paper 1/8″ smaller again to get the layered look, I embossed the sentiment in gold on a piece of whisper white cardstock and layered  onto the crumb cake stitched circle. I placed a gold snowflake in the middle of my card and layered the circles on top.

I covered the notebook with a piece of garden green cardstock which I measured against the notebook and folded over the back, mine measured 3 3/8″ by 5 5/8″ (please bear in mind that not all notebooks are the same measurement so double check yours.)  the designer paper is 1/8″ smaller ,I added another snowflake and used the merry little labels stamp set to stamp” just for you”. I fussy cut it out as I do not have the everyday label punch yet haha.

For the tealight box I used our mini pizza boxes and measured each side and the top to get my measurements for the garden green cardstock and the designer paper again I used a snowflake so I have a matching set, finished with a pretty bow.

I hope you like the projects and thanks for stopping by….Debbie x


Vintage style Christmas box

As promised below is my Christmas eve box, altered and decorated vintage style.

I decoupaged the designer paper to the box and sanded the edges to give a distressed look, this also help make the join of the paper more cohesive to the box as if they are one and the same, I then used Tim Holtz vintage photo distress ink on the edges. The chipboard decorative pieces have been embossed with gold embossing powder and added to the box then finished off with a lovely burlap poinsettia bow. I hope you like this project as much as I enjoyed crearing it……..please feel free to comment like and share I would be most grateful. Thankyou for stopping by.

vintage box

MAWTT

Well its time again for the card challenge from moving along with the times, this time it is animals on a Christmas themed card, the card base is 4 1/4 by 11 3/4 inch scored and folded at 5 7/8 inch in whisper white. The designer series paper mat is 1/8 inch smaller than the base. I then cut 3 rectangles in  gold glimmer paper, real red cardstock and whisper white cardstock for the sentiment.

I also cut 3 circles in the same colours and die cut 2 reindeer, 1 in gold glimmer paper and 1 in the designer series paper.

I hope you like this card……please feel free to leave me a comment….thanks for stopping by.

animal xmas card for mawtt

http://movingalongwiththetimes.blogspot.co.uk/

Christmas eve boxes

Hello all, Christmas eve boxes I think are a relatively new concept for the uk, well to me anyway haha, but are very popular in other countries especially the usa, this is my take on the project, something to treasure and use every year. It started as a plain wooden box and I decoupaged it with a stag themed Christmas paper,  as these 2 are for my boys I went for a more masculine look, the edges have been sanded to give them a distressed look and then distressed further with smokey slate ink,

The bauble and star and other chipboard decorations have been embossed with silver embossing powder and then finished with a stag decorated burlap bow……… I really enjoyed this project i hope you like it too, please feel free to comment it would be lovely to see your opinion………………………… thanks for stopping by x

Watch this space for my vintage style Christmas box!!!!

christmas eve boxes m&t

Christmas advent calender

Another week starting and another week closer to Christmas, so much to do so little time haha!! seems never ending but a lovely time also getting things ready and try new crafts. Below is one my recent projects an advent calender made from a mdf frame and wooden boxes. Each box has been decoupaged, sanded to distress the edges and then distressed with Tim Holtz vintage photo distress ink. I then decorated and numbered each box, such a lovely project to do and something to treasure each year.

I really enjoyed this project…hope you like it too feel free to leave me a comment…..thanks for stopping by x

advent calender m&t

Challenges!!!

My post today is my entry into the Moving along with times challenge ( link below) the theme this time is trees, there are some lovely projects already submitted, so I wish everyone good luck.

tree challenge

Card base is Whisper White and measures 51/2 by 41/4 inch, I used an embossing folder on the Whisper White mat which is 1/8 of an inch smaller than the base. layering circles for the stamped image and a flagged sentiment.

http://movingalongwiththetimes.blogspot.co.uk/


Christmas gift card or Money wallet

Todays post is a step by step instruction on how to make Money or gift card wallets,

This is not my idea there are various options for making these and video tutorials online but this is my take on it.

I started with a piece of Whisper White cardstock measuring 8 1/4  by 4 7/8 inches and scored on the 8 1/4 side at 2 3/4 inches and 5 3/4 inches


cardstock size

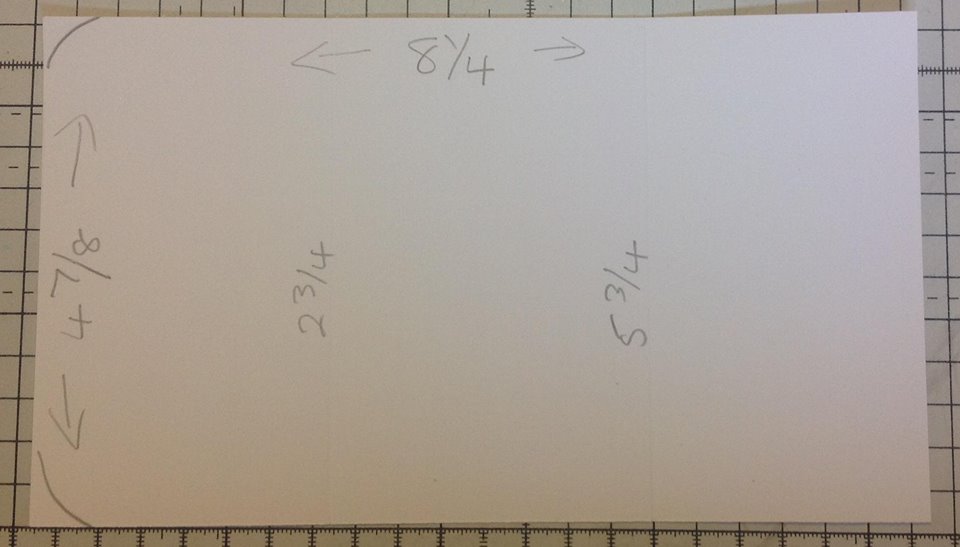
Fold and Burnish both score lines and round the corners of the larger flap.


Place a very thin line of glue down each edge shown and adhere, start adding cardstock and dsp mats.

folded cardstock size

I used Cherry Cobbler cardstock  mats and Warmth and Cheer dsp, I think this has retired but any of the current designer series paper will co-ordinate, that’s the beauty of Stampin up everything co-ordinates.

MATS : 2 x 4 3/4 by 2 5/8 inches ( Round the corners of 1 edge on both )

1 x 4 3/4 by 2 3/8 inches

DSP    : 2 X 4 5/8 by 2 1/2 inches ( Round the corners of 1 edge on both )

1 x4 5/8 by 2 1/4 inches

Please bear in mind that if you are using a paper that has a specific pattern, that you cut it the way you would like the paper to sit.

front of wallet        inside folded wallet

finished wallet

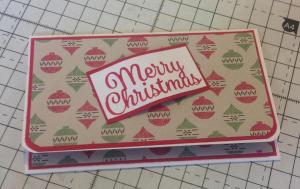
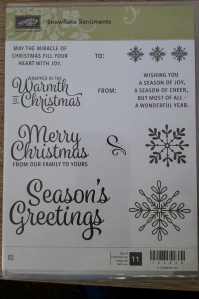
I used a scrap piece of Cherry Cobbler and Whisper White cardstock to cut the Stitched shaped framelits for the” to and from” stamp inside and a scrap piece of both for the sentiment on the front which comes from the Snowflake Sentiments Stamp set.

stamp set     Products used: Cherry cobbler cardstock item no: 121651

Whisper White cardstock item no: 106549

Stamping trimmer            item no: 129722

Simply scored tool            item no: 122334

Stitched framelits             item no: 145372

Snowflake sentiments     item no: 144820

Tombow liquid glue        item no: 110755

I hope you find inspiration in this project, please feel free to leave me  comment and visit my online shop here where all the products used can be purchased.

Thank you for stopping by, happy crafting.
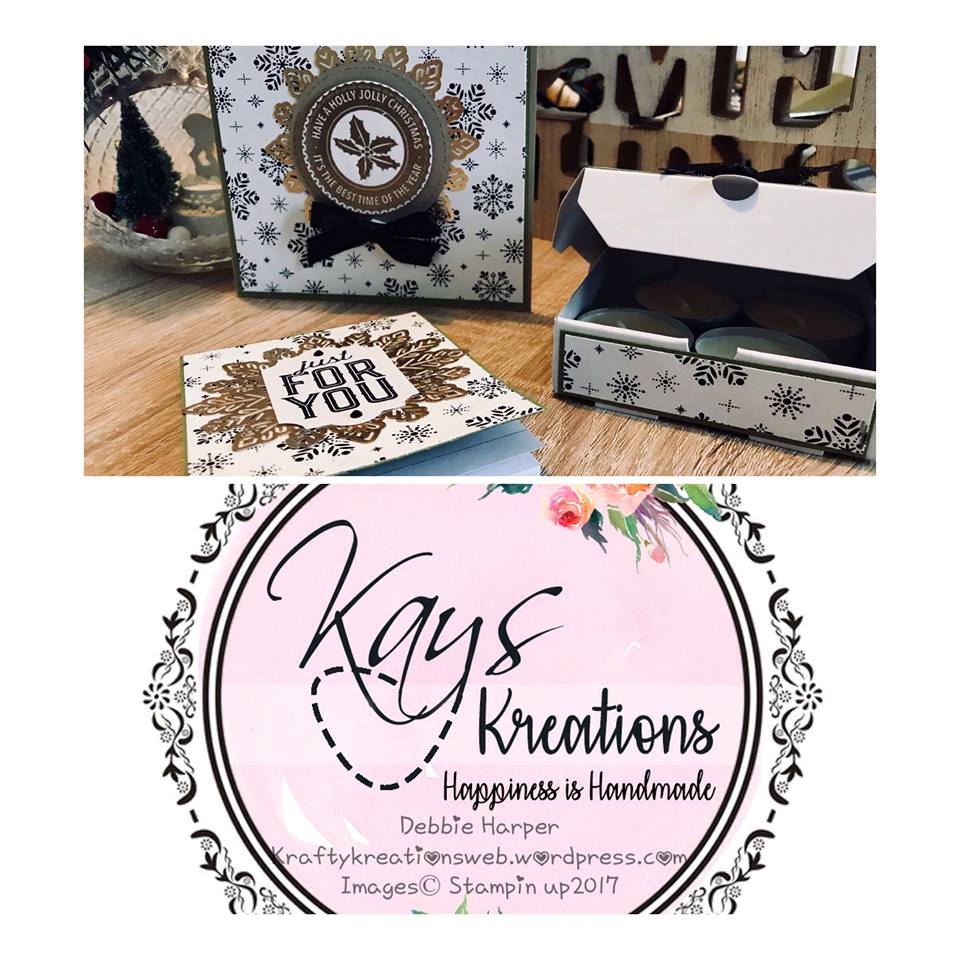